Overview
I designed, developed, and delivered Workday training to the campus as part of go-live installation. Workday will replace our aging on-premises PeopleSoft ERP.
Workday HCM, Financials, and Payroll modules went live April 2023. For users of these modules, their current ways of understanding and performing their jobs will completely change. The Student module went live January 2024.
My design, development, and delivery goal for the project was to create a culture of engagement and adoption by gradually guiding users through levels of Workday proficiency in preparation for their campus role.
In the next few paragraphs I’ll walk through what I did and how I did it.
Design
I was very involved in gap analysis, where we organized training production into hierarchical skill groups, with increasingly Workday specific user skill sets. We segmented the campus into three groups.
Taking the long view, I wanted to develop a culture of engagement and adoption. To get there I am building a hands-on, gradually immersive experience into the training while also providing multiple points support at go-live.
And, since not everyone needs trained to the same level of proficiency, a three-phase training process will scaffold each campus user toward the correct level of proficiency. We use the results oriented approach of “I do one. We do one. You do one.”
Here’s how it’s getting done.
In Phase I are those needing the most general knowledge of navigation and search. Faculty, staff, students – everyone needs this training. All of campus will receive Phase I training.
Phase II audience are employees. They need Workday to view their pay slip, check their paid time off balance, or register for benefits, but do not use Workday for their day-to-day tasks.
Phase III development is focused on the hundreds of university workers whose jobs involve using Workday to perform a business process. For example, open a requisition, submit expense reports, or begin a new hire. These users will experience the most change. I know our campus population and, based on my Workday experience to date, saw the changes users were about to experience to be drastic. At this point in design, I decided there was way too much new information for users to recall in the moment they would need it.
I Supplemented ADDIE with the 5 Moments of Need Design Framework
To my thinking, learning Workday linearly was too slow and the traditional, terminology first, then ‘Basics’, and then ‘Intermediate’ course progression did not connect our users with their new Workday tasks. With these kinds of titles and structure, what connects learning to their job, and why even attend? There was too much ‘about Workday conversation’ and not enough hands-on, experiential stuff.
For Phase III users especially, all-encompassing training modules presenting every detail of a user’s new Workday role, will be too much to recall on day 1. It would overload most anyone. Monolithic, ‘Basic’ and ‘Intermediate’, one and done courses were not the answer. We needed readily available tools that will refresh the memory. We are achieving this goal using a performance support framework 5 Moments details.
We developed training to support these moments of need:
- When learning for the first time
- When wanting to learn more
- When trying to remember and/or apply
- When there is a change in process
- When the unexpected occurs
5 Moments’ Performance Support
Using a results-oriented approach of, “I do one. We do one. You do one.”, Phases I-III have an instructor led component, facilitated lab, and Q&A sessions that ease users into this new enterprise platform.
For employees wanting to learn more, all phases have 24/7 online, self-paced LMS based courses, with job aids, video demonstrations, and a demo tenant. This content rich environment enables self-learners to update skills or refresh skills and accommodates a non-traditional schedule.
Instructor led courses also include training tenants and job aids to provide experiential learning for Phase I-III skills.
All of our business process will change. Looking for performance support in that moment you need it should be a simple thing.
I answered this need when I built the Workday training website. It serves as a central location, a training catalog, for all Workday performance support content. Even the campus Support Desk will reference the training catalog during their support calls, a single source of truth. From the training catalog page, users are linked out to the correct LMS courses or job aids (all Workday content must be behind a log in).
The website is an easily updated catalog of training material available to the campus. It is a public site, viewable here: https://www.uakron.edu/workday/training/
To solve problems our users will encounter during go-live, I proposed a ‘war room’, staffed by the same project team that is installing Workday, provide live Teams chat support.
How I Developed the Phase I Course
I used these five tools for development:
- Storyboard: a word processor
- Screen recorder: Articulate, an eLearning authoring tool
- Audio production: Ableton Live and Bitwig Studio, digital audio workstations (DAW)
- Graphics work: when I need to customize a screenshot or create an asset, I used Affinity Photo and Affinity Designer.
- Video and audio compositing: DaVinci Resolve
I used Storyboards to plan course content and structure
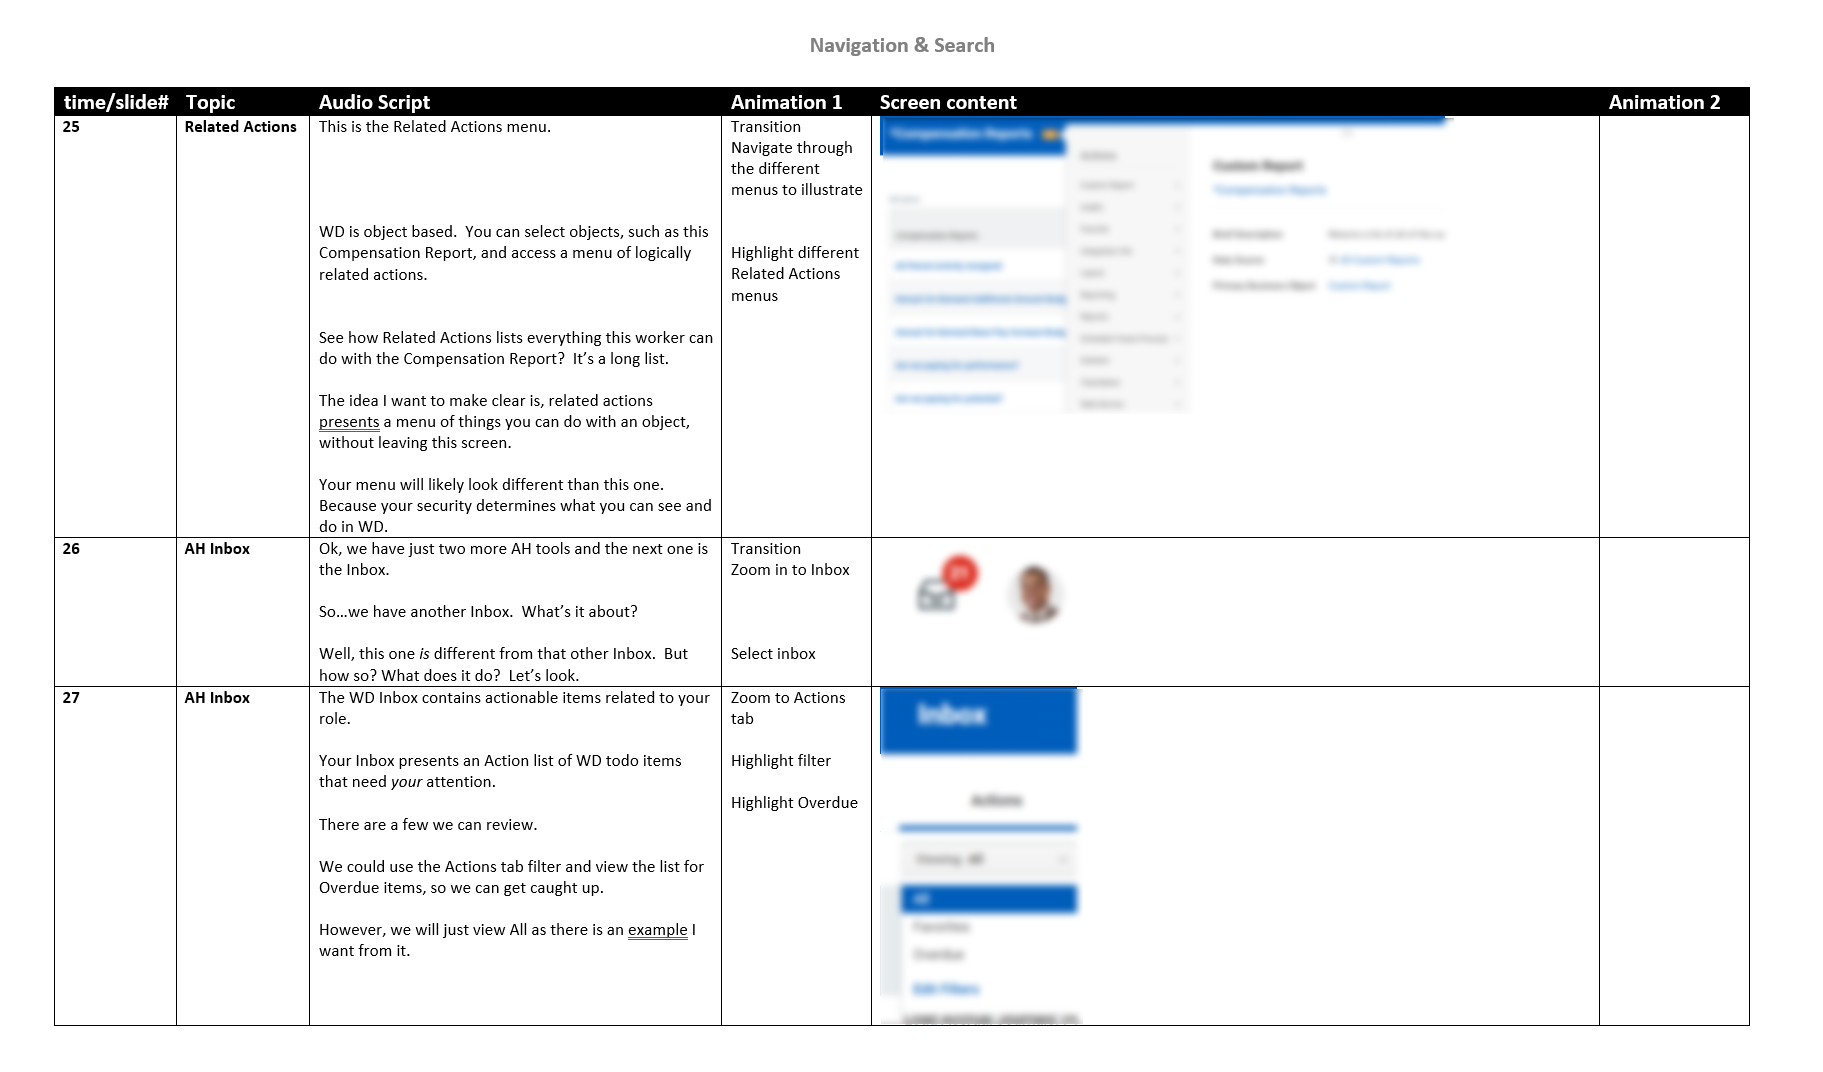 Building detailed storyboard
For each course, I first created a detailed storyboard (the above example is from a 17-page storyboard) and map the slide number, topic, audio script, animation and screen content for each slide. Every screenshot, emphasis animation, transition, and spoken word was carefully planned and documented in detail. I review this first draft for organization and consistency, cohesion, gaps, logic errors. I iterate until I’m satisfied the story is clear, complete, and concise.
For the first course, I was also the subject matter expert. I wrote the content, designed the course and completed development in less than two weeks. The final video was 10 minutes long and is an important part of its LMS course.
Authoring tool
I use ActivePresenter for primary screen capture and cursor edits. Its slide deck format is convenient and familiar. I prefer it to recording directly to video because it is often necessary to make edits and corrections afterwards, like changing the cursor position, removing unnecessary cursor movement, or making minor edits to a dialog box, all of which ActivePresenter supports. Having only a video, I can’t just pick-up and move the cursor, it’s necessary to record the video again.
I build slides following my storyboard. At this point, the hard work is in the storyboard. It’s my recipe and I just follow the steps: add a new slide, add the audio, add the graphics, add emphasis animation, add cursor movement, synchronize timings, and compare against the storyboard. I repeat until the deck is done. I don’t get lost in a moment, forget what I was doing, because I always have my reference document, my recipe.
To keep editing later simple, I make simple slides. A slide does one thing, then moves on. This practice also works well with storyboarding. Edits to a storyboard translate easily to the slide deck. I also name each slide object for easy reference later. I re-use a lot of elements, which keeps me efficient. For this Workday project I created a small library of elements I knew would get lots of use in the deck and stored them in the project template. Instead of creating elements again or hunting for ‘which slide was that on?’, I just pulled them from the library.
I also customize keyboard shortcuts to speed my workflow. Inserting media, calling-up the library, reviewing the project, are tasks completed more quickly in every project.
I can use different authoring tools and use Articulate for many projects. While Articulate offered the deck format, I also needed to edit cursor position or add cursor emphasis, which Articulate could not do, and used ActivePresenter (yellow highlights, concentric click rings, ease-in/out cursor speed). When ready for the next step, video editing, I export the project to MP4 format.
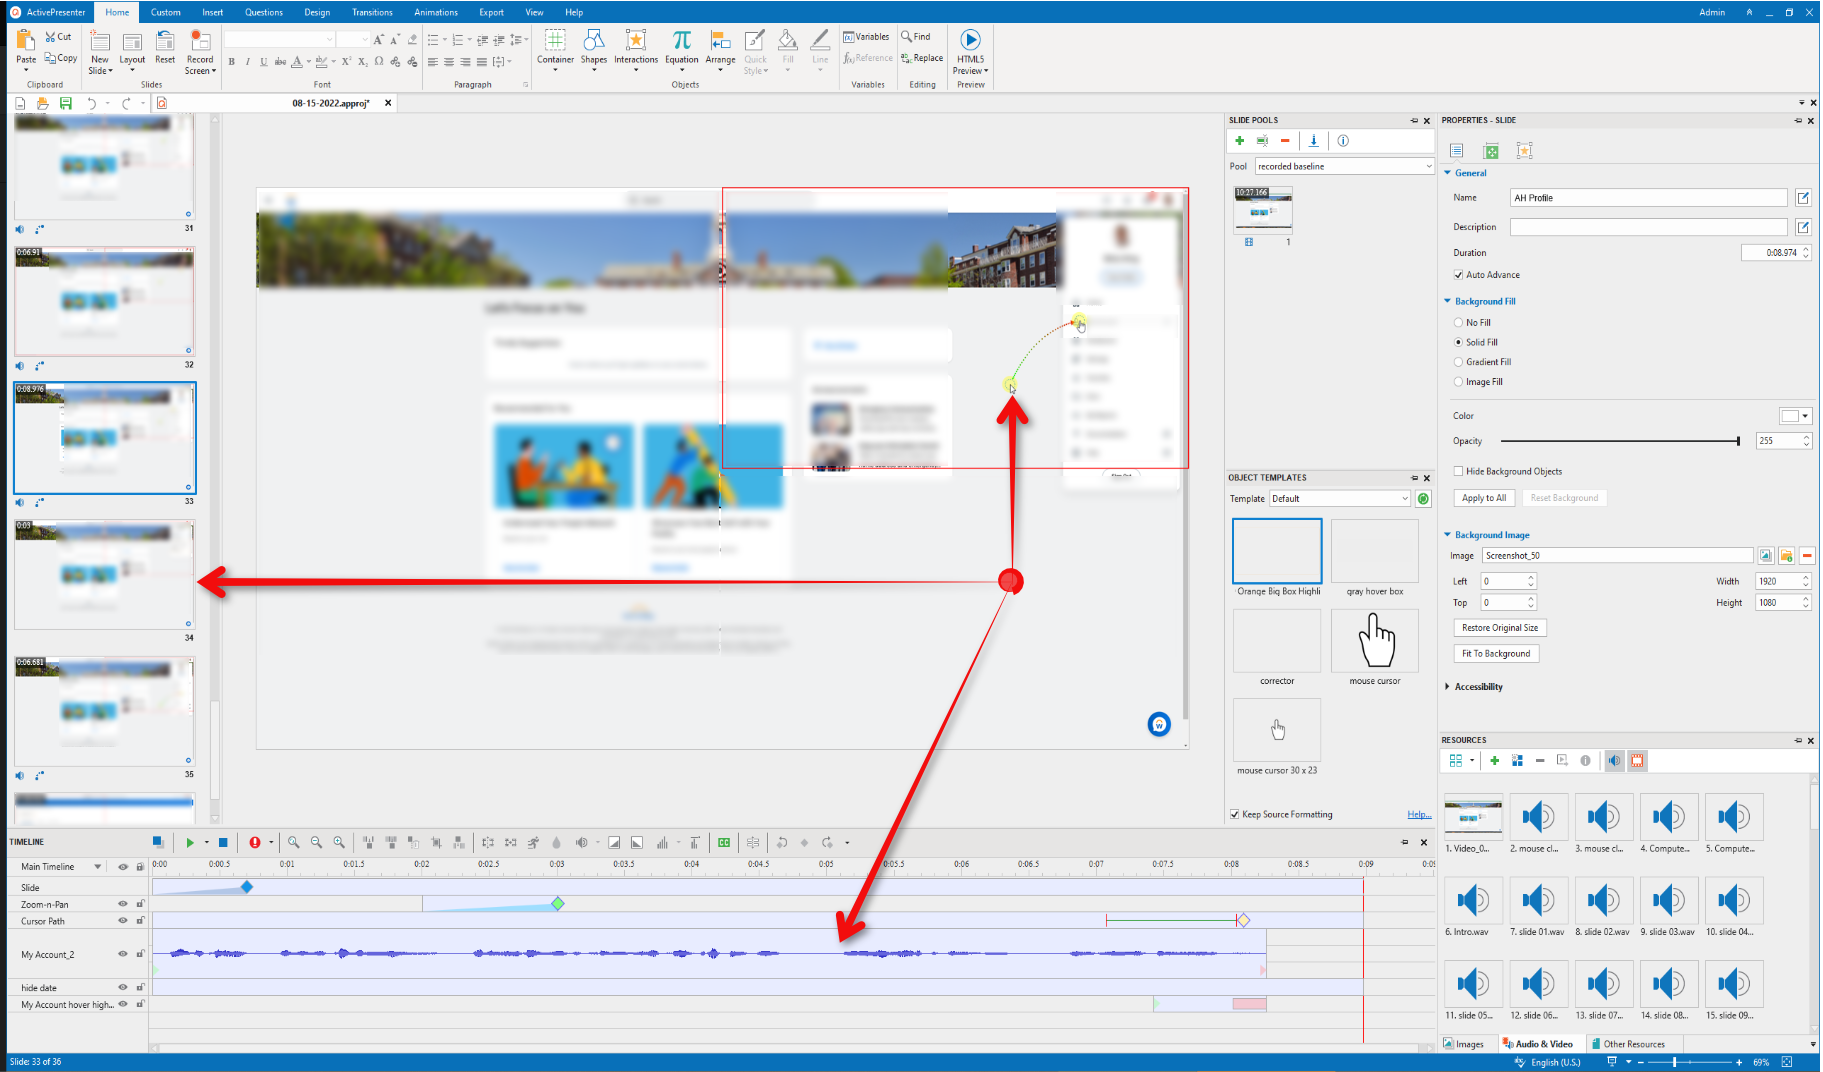 Screen capture, adding emphasis, synchronizing voice over, and editing cursor movement
Why I create a separate audio track
Once the storyboard is ready, I can record the audio track. I record audio at my home studio, where I have professional equipment and a good recording space.
The audio step is kept separate because I want the control and features of professional tools. I don’t present in-person, so it’s important I sound like I am sitting next to the listener, having a conversation with them. I do not use a ‘talk at’ tone and firmly believe the difference greatly improves engagement. When recording, I paste a picture on my office wall of the kindest person I know, my wife, and we have a conversation.
Using a Shure SM58 microphone, I record into a professional digital audio workstation, Bitwig Studio. Another reason I record into a DAW is quicker editing. When reading the storyboard script, I get most of it the way I want but occasionally flub a word or want to change the pacing or emphasis of a sentence or phrase. It’s a simple matter to re-record only what needs changed, getting exactly what I want.
I use the DAW to clean and enhance tracks. I remove any room echo, pops and sharp s-sounds, then add some bass and higher-end crispness to my voice, then reduce the contrast between the overall highs and lows. The result is a professional audio track ready to layer into the video.
Recently, I began adding a music bed, in some projects. It’s a separate track, that plays under my voice, where it’s audible but very quiet. I’ve observed the practice in many YouTube tutorials and like the energy music can add overall, while also putting texture in the quiet spots it gives listeners something to hold on to. Surveying campus users, the result is improved engagement.
As each track is completed, I label its sections to match the slide in which slide it’s layered. I record the whole presentation on one track, so the room noise is the same, the tone is consistent, and enhancements are easier. When ready, each section is exported to a WAV file for use in the next step.
How did I use a video editor to increase engagement?
I use the video editor DaVinci Resolve Studio to compile the exported video, audio tracks, the music bed (if used), and add transitions. These design choices are meant to get and hold attention in the first 30 seconds, increasing viewer engagement.
Why? Today, people have many choices as to how they consume content and are used to at-hand screens, filled with continuous engaging content that is far less work than watching than a talking-head training video. Increasingly, I must compete for viewer attention. So I use DaVinci’s broadcast quality video effects and audio layers to increase viewer engagement.
How? First, I use the more interesting/less common transitions, not available in other business software. DaVinci’s broadcast quality transitions and titles are far more engaging than the wipes, covers and reveals we have seen far too many times. There are two samples in the GIF below: the noise dissolve from black and white to color and the text box swipe in. Many viewers of training video have seen every flavor of transition and animation PowerPoint has to offer. Presented with a new experience? I have their attention. When I introduce, the course my voice is full of energy and urgency. I then hand the work off to the riser (green audio track) and noise dissolve. The riser builds tension that resolves into the beginning of the software demo. Viewers follow the riser, have heard and seen something new, and they are interested! At least for the next 30 seconds.
My content is designed to be quick, so there is no need to say, ‘In this course, you’ll learn these 15 things.’, because the content is structured the way people like to view video. It’s short. One topic, one video. It’s not a theatrical release. The first video was less than 10 minutes. The second and later videos are less than 5 minutes. People want to get in and get out. Learn the thing and move on. Pedagogical overhead is cut.
I often add a quiet, sometimes energetic, background music track. In DaVinci I control the volume of the music and lower the volume when there is speaking (duck under the spoken audio) and raise it when there is a period of ‘not speaking’. The idea is called ducking and when set up correctly, the background music is controlled automatically. It’s not a manual process.
I do all of this to grab user attention in the first 30 seconds and say, ‘Pay attention. This is different.’
When completed, I export the video for posting to LMS, YouTube, or the Office 365 Stream application, whatever platform I need to. I generate an embed url for the LMS.
![]() Increased user engagement with DaVinci Resolve’s visual effects.
Increased user engagement with DaVinci Resolve’s visual effects.
Delivery
I use instructor led and video-based methods to deliver Phase I training. Instructor led is currently demonstration only, consistent with our goal to gradually introduce campus to the new work environment. The video work product detailed above is included as part of the first new user Workday LMS course. Also included in the course are customized Workday provided job aids.
Incentivizing Participation, Encourages Engagement
Anticipating some hesitancy, I thought encouraging Phase I participants to continue learning by registering for Phase II. The move was a high profile, early win, for the training effort. Change is painful for many and exciting for some so I decided to gamify completion of Phase I & II courses. The excited people needed no encouragement!
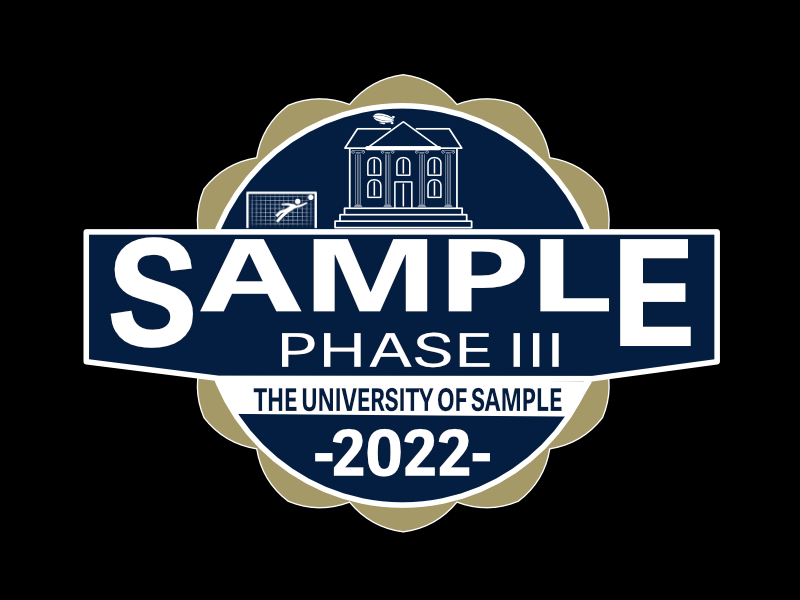
The incentives offered are badges for each level of completion. One for each training phase, signifying early adopter status. A limited number of badges were available, in an effort to further encourage early adopters and established training production momentum. Badges are permitted for email signature line usage but only for participants.
I designed and developed three separate badges using Affinity Designer (I can also use Illustrator). Each included the traditional badge elements of a banner, circle, and scalloped outer edge. To these I added ‘status elements’ further incentivizing completion of the different levels. The status symbols included the call sign from our radio station, our mascot, a soccer element representing our Top 10 soccer team, and a generic blimp that regularly flies the city skyline.
My inspiration for the design was an earlier badge I noticed for use in a campus communication. I saved time, modifying a graphic from my service (all elements licensed for modification) to better approximate the mascot, created the radio call sign from scratch, and also modified a blimp from my graphic service. The banner, scalloped edge and content circle design elements were best done from scratch in Affinity Designer. Overall, I created three custom assets without starting from scratch.
 Incentivizing Participation
Closing
Response has been positive. Over 50% attending Phase I training registered for the next session before I finished the presentation. Phase II training has even more registrations.
As of this writing, project leadership has begun work on the Workday Student module, itself a yearlong project ending in 2024. I am currently meeting with project leadership and our implementation partner to strategize how I will support concurrent multi-phase projects.